Op Art 1960s Ad How to Draw Op Art Step by Step
Easy Op Art Drawing
Today you lot'll learn how to draw an op art bullseye in this like shooting fish in a barrel to follow pace by step optical art tutorial. I've been drawing these for several years, and they are however a lot of fun. They can be used as a finished work of art all on it'southward own. Or they tin be used in the groundwork to add an interesting accent.
This tutorial is dandy for beginners of all ages and the variations are endless. From the medium you apply, to the colors schemes you apply to your finished cartoon.
What is Op Art
Op fine art, brusk for optical art, is a grade of abstract art that fools your middle. I of two things unremarkably happens when viewing optical fine art. Either the lines and shapes announced to move, or you lot encounter something unlike depending on where y'all focus your eyes. Bridget Riley and Victor Vasarely are credited as being the founders of the optical art movement which emerged in the 1960's. Learn more at The History of Op Fine art.
* Some of the links in this mail may be affiliate links. This ways I receive pocket-size commissions for purchases made through these links at no actress cost to you.
Art Supplies
- Pencil
- Ruler
- Paper
- Colored Pencils (or other medium for calculation color)
Complimentary op fine art challenge guide
Footstep past Stride How to Draw an Op Art Bullseye
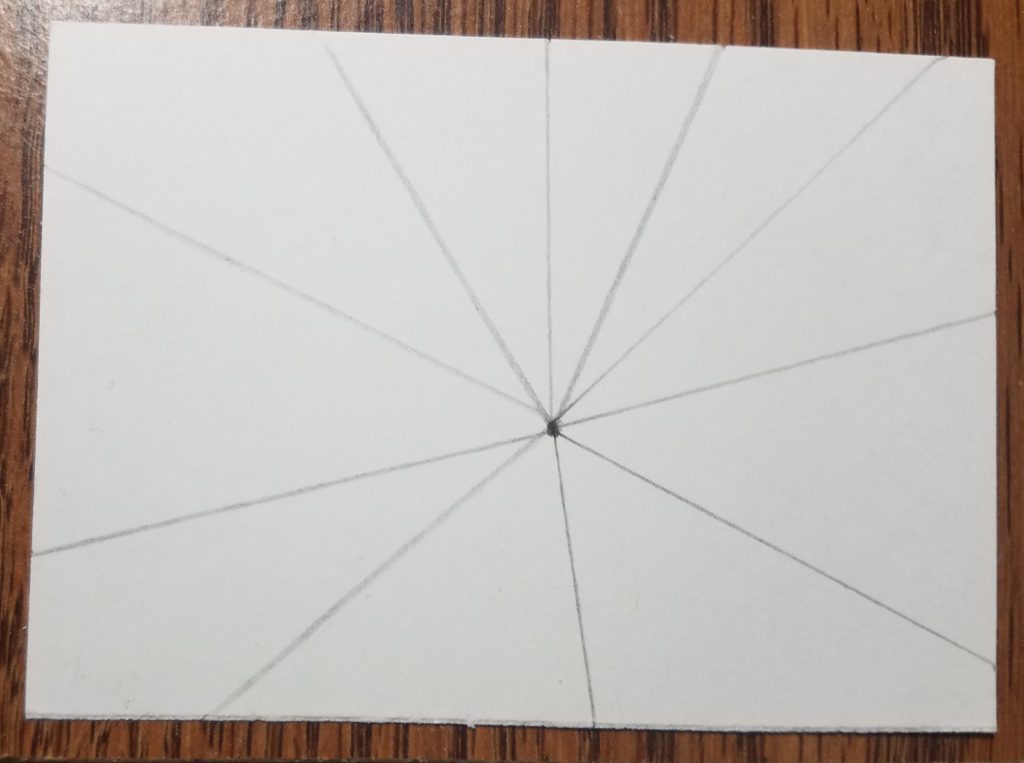
Vanishing Indicate
The first thing you need to practice is determine where you want your vanishing point to be. The vanishing point is the spot where your lines come together. You can describe information technology right in the center of your paper or you tin place it somewhere off-centre. The choice is totally up to yous. Where you identify your vanishing point will modify the look of your final cartoon.
Draw Your Lines
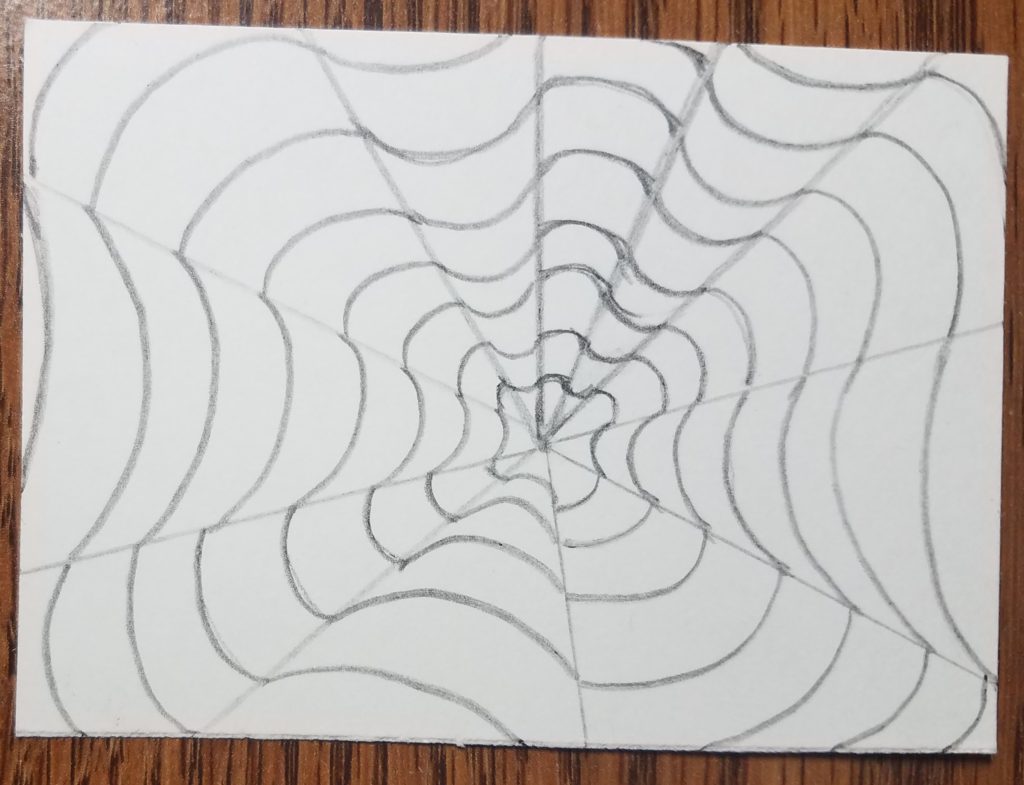
Subsequently yous've decided where to place your vanishing point, depict radiating lines coming out from that point. I find it easier if y'all use a ruler to do this. Make certain you lot depict an even number of lines. If you depict an odd number of lines, your design volition non work out. I used a regular pencil to depict everything out first. The space betwixt each line does not have to exist the same. Even so, you desire to avert having too large of gaps as it will making lining upwardly your curved lines in the adjacent steps more difficult.
Yous could also draw these lines freehand. Using a ruler or drawing them freehand will requite you lot slightly different looks.
Add Curved Lines
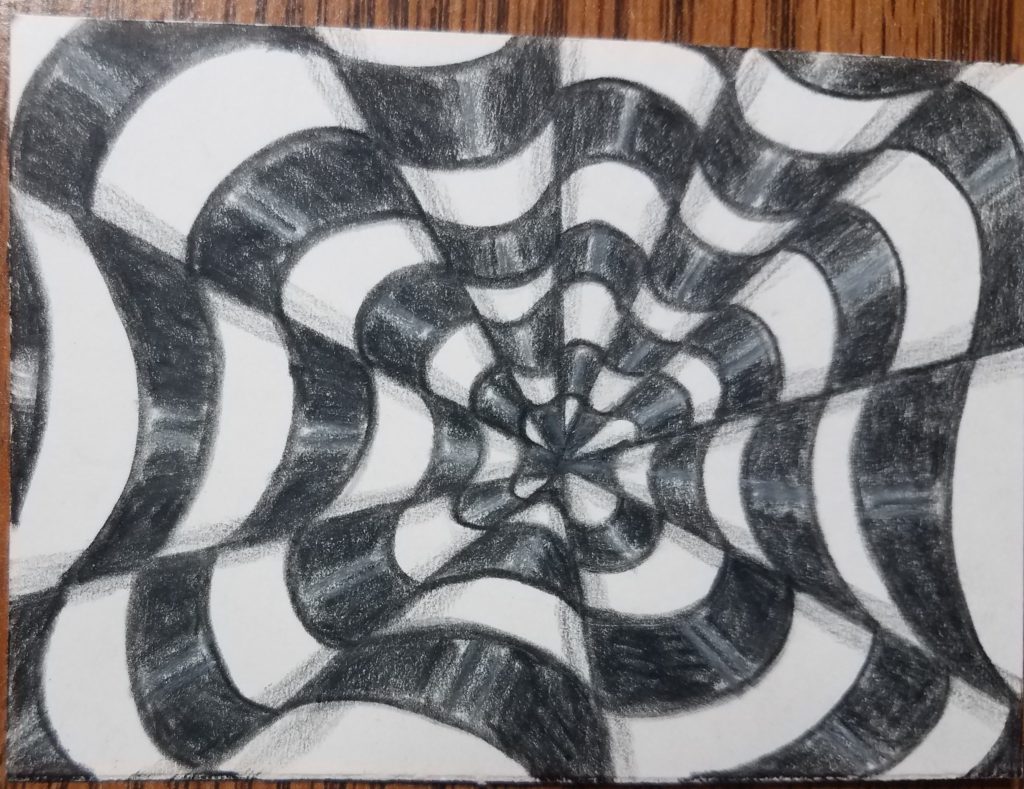
Describe curved lines in each of the sections. When drawing your lines, alternate between curving your lines down and curving them upward (from department to section). I started my first section with lines that the arch curves upwardly. Effort to go along your curved lines as close to the aforementioned equally possible. They should be parallel with each other. In the paradigm below, the start section is completed.
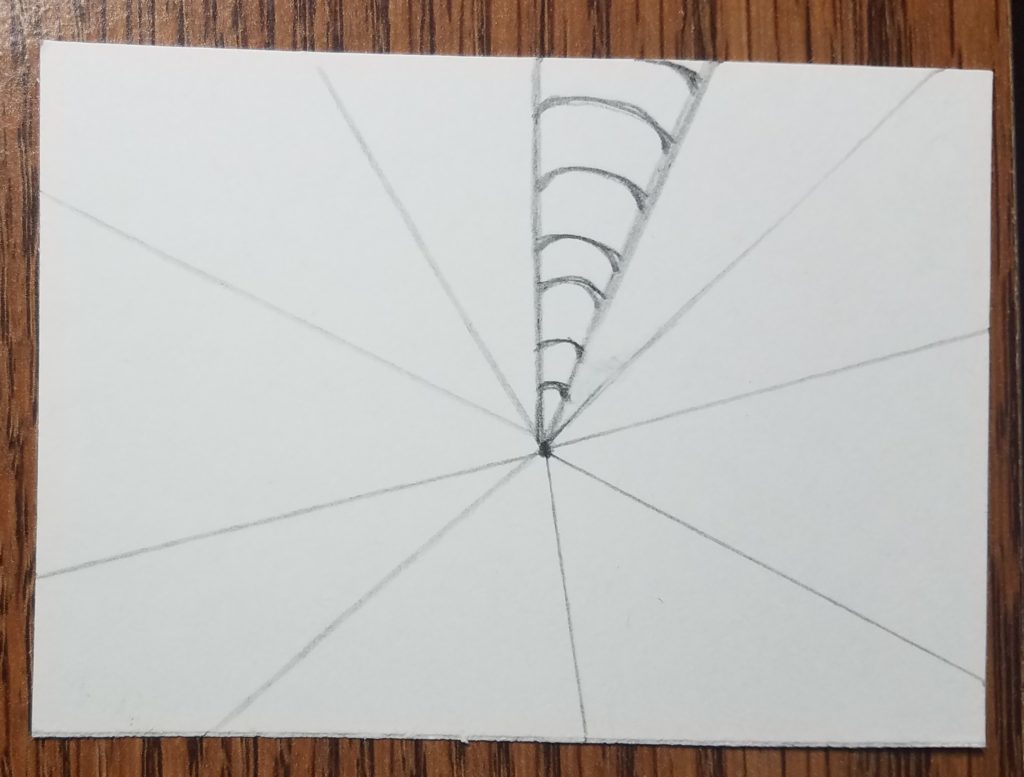
The adjacent sections on the left and the right will need to bend the opposite direction, and so I curved them down. When cartoon your lines, you desire them to line upwardly with the lines on either side. If your lines do non line upward with ane another, your final cartoon will not wait right.
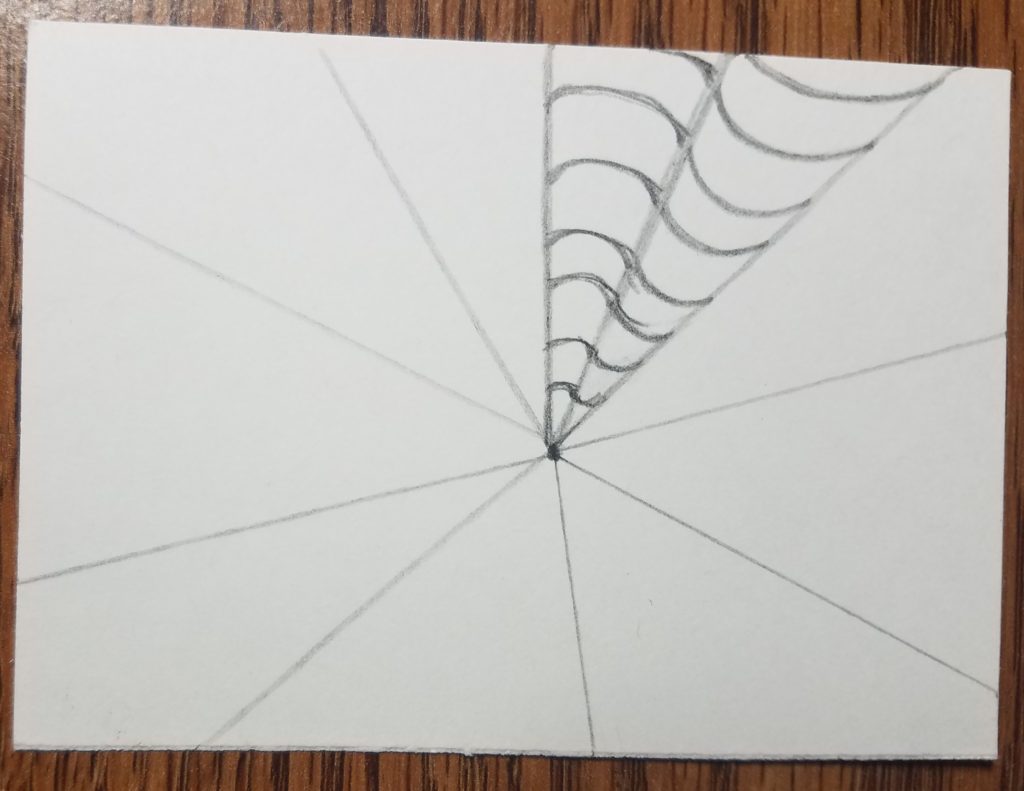
Work your fashion around each section, alternating the management your lines curve until all your sections have been filled in. If you drew an odd number of radiating lines, you'll end upwardly with ii adjacent sections having the aforementioned direction of curved lines. If this happens, you lot would need to start over as it would ruin the optical illusion.
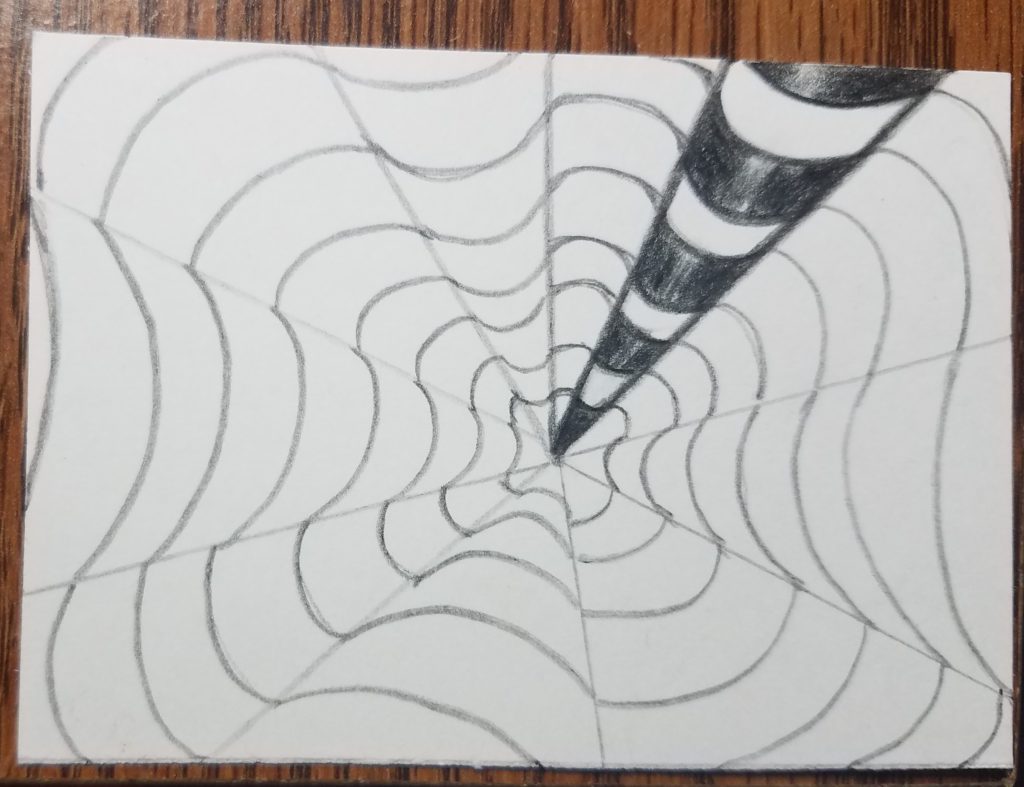
Outline and Coloring Your Op Art Bullseye
Now it'due south fourth dimension to outline your drawing and add color to your sections. You tin choose ane color and leave the sections in between white. Or y'all can use two or more colors. Just be sure to alternate colors and stick to a pattern. I decided to use simply blackness for my drawing. I used a black Prismacolor pencil. You could besides apply a thin black mark to outline your drawing.
To acquire more near Prismacolor pencils, visit Prismacolor Colored Pencil Review – 48 Pack.
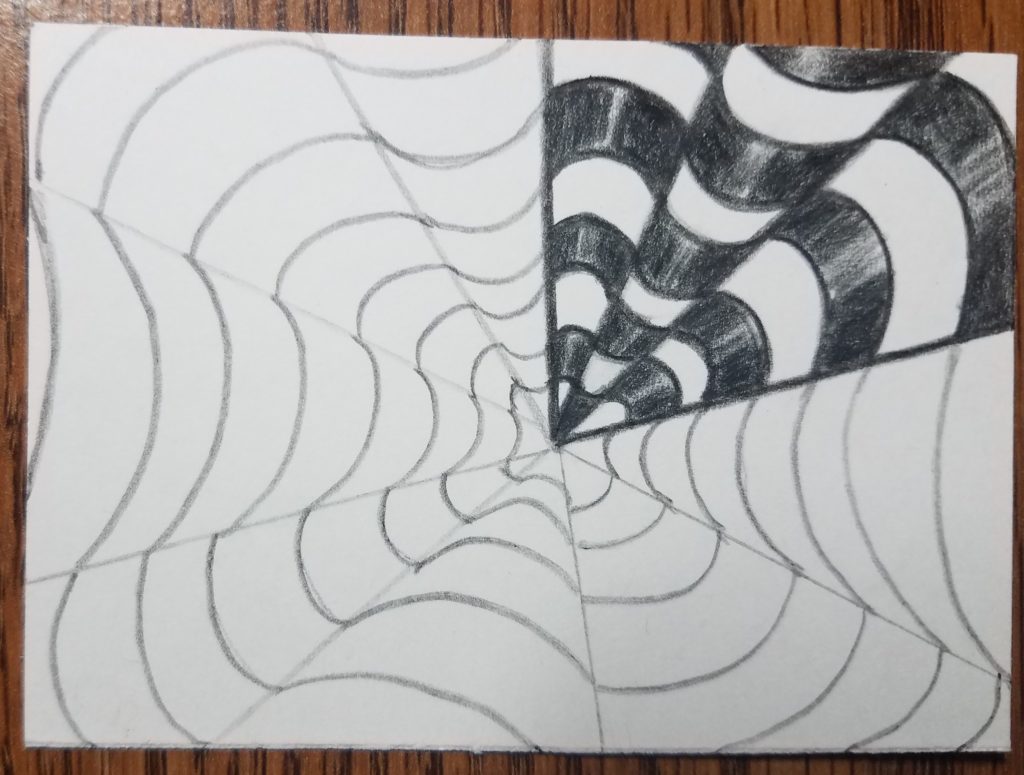
When adding color, leave a little bit of a highlight right downward the middle of each department to make your cartoon look more three-dimensional. You could also go in with a kneaded eraser later coloring and lift some of the color dorsum off. I discover it easier to just get out a piddling bit of white showing.
If you lot choose to utilise more than one color, I would encourage you lot to use a color scheme. If you utilise random colors, your final work of fine art will not have unity. Following a color scheme will make your finished piece of work much more interesting to await at.
To learn more most color theory, cheque out The 7 Elements of Fine art.
Alternate Colored Areas
Go along working your way around your drawing, adding colour to alternate sections. In my example, if an area is black, the one directly next to it volition need to be white. The pattern should alternate black and white from the vanishing bespeak to the outside edge of your paper. You should also have an alternate black and white pattern going around your cartoon.
Completed Pattern
This is what your drawing should look like with everything filled in. Equally you can run into, I left a white highlight right downwardly the center of each department of black. Leaving the highlights gives the result of the sections being rounded and makes information technology look like they are popping off the paper.
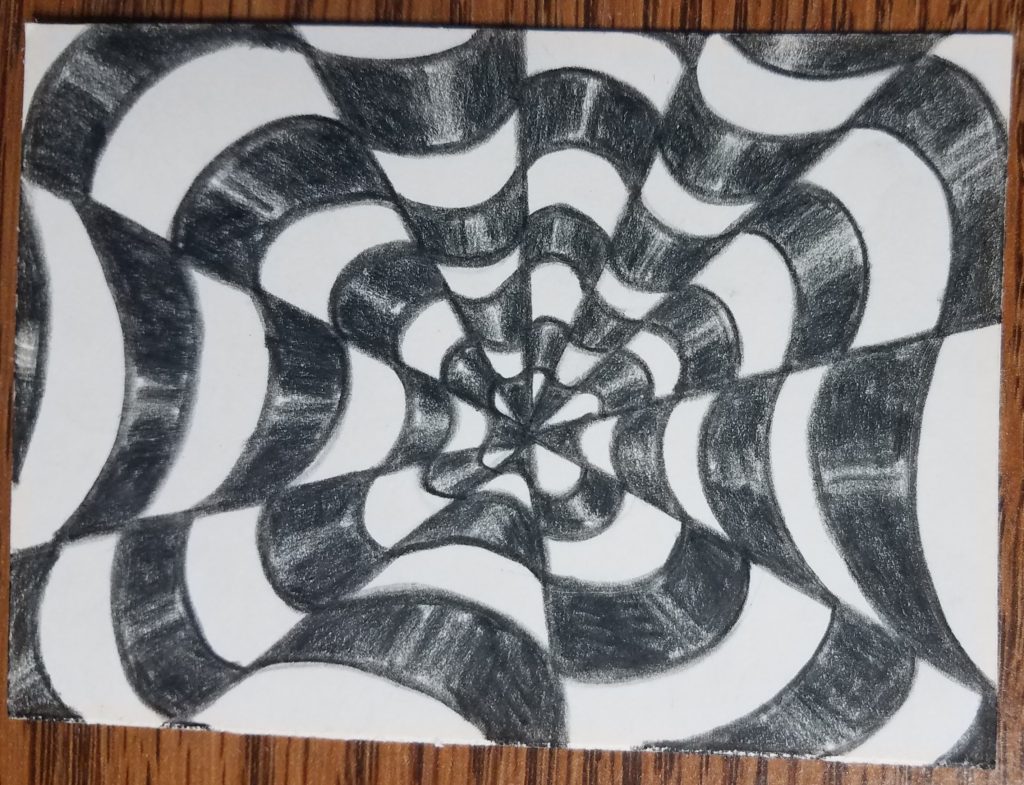
Op Art Drawing – Bullseye
The last matter I did was to go in and add together some shadows forth the edges to make the drawing look even more than three-dimensional. You can shade in your edges or leave them the way they are. This is a personal preference.
I hope you enjoyed this lesson on how to draw an op art bullseye. Don't be agape to experiment with different color schemes and different media.
Easy Op Art Drawings
The example beneath was created in a slightly unlike fashion. For this i I drew my radiating lines without using a ruler, so they are not quite every bit directly every bit the ones in the previous example. I also used a blackness marker for my outlines and to make full in the black areas. For the color, I used a cool color scheme.
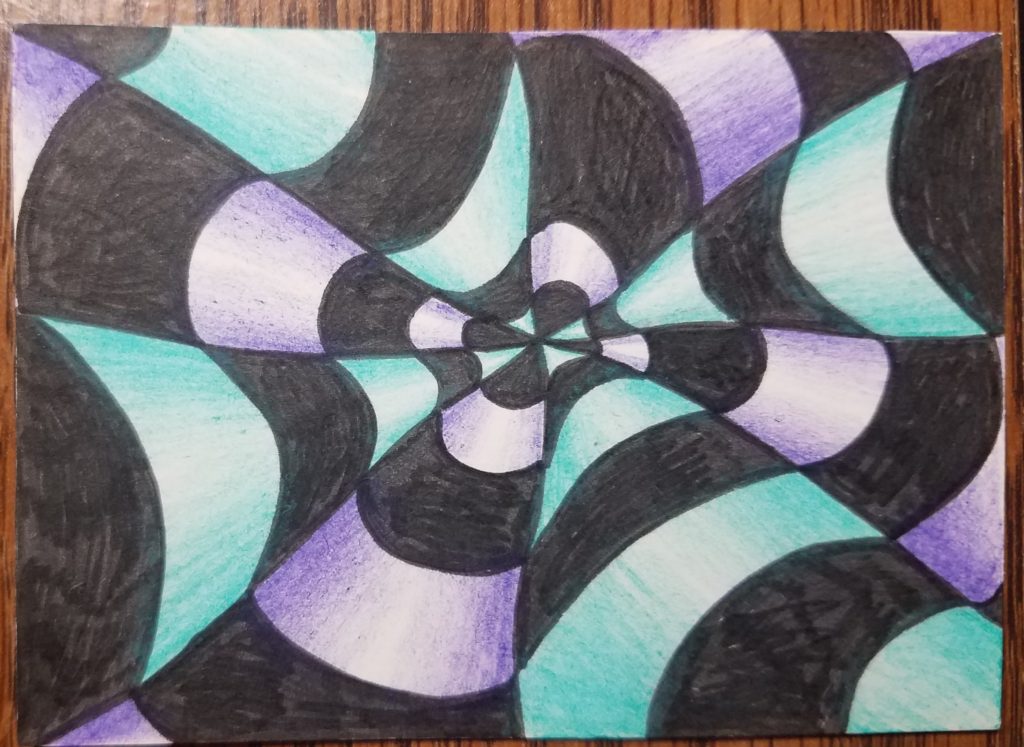
I did my drawing on an Artist Trading Card (ATC). One time traded, this card volition be sent off to a new home. If you are not familiar with ATCs, I encourage you to check out my tutorial on How to Make Artist Trading Cards. ATCs are a great way to practice drawing and creating works of art.
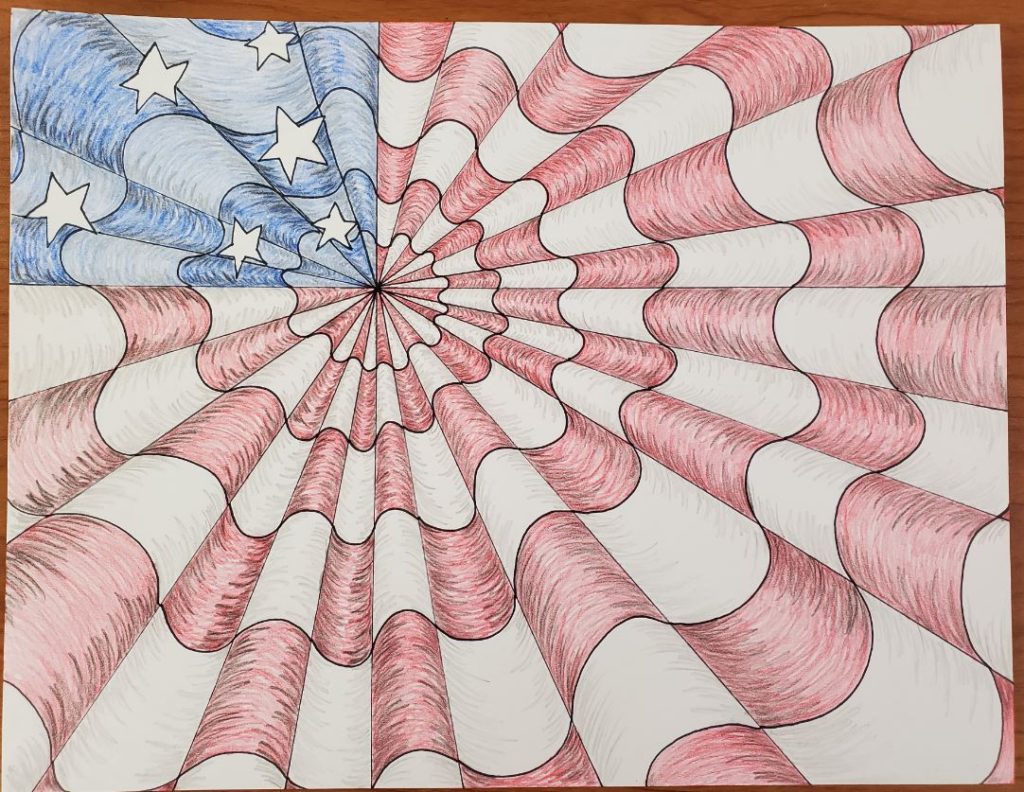
How almost a patriotic twist? Learn how in this 4th of July optical art tutorial.
How to Draw an Op Art Bullseye
If you like optical art drawings, check out these other tutorials nosotros take for creating your own optical illusions.
Go your Gratuitous Op Fine art Challenge Guide
More Like shooting fish in a barrel Optical Fine art Tutorials
- How to Draw Op Fine art Tubes | Piece of cake
- five Simple Steps to Drawing Op Art Easily
- 7 Mean solar day Drawing Challenge – Op Art Bullseye

Roshanda is an art didactics blogger who is on a mission to jitney and encourage as many aspiring artists as possible through the use of her blog. Learn more about her on the About Me page and connect with her on Facebook, Twitter, and Instagram.
luttrellpricetoody.blogspot.com
Source: https://artbyro.com/how-to-draw-an-op-art-bullseye/
0 Response to "Op Art 1960s Ad How to Draw Op Art Step by Step"
Post a Comment